dungvl

Author Archives: dungvl

Carbon vs Aluminum Mountain Bike Wheels

As you might have noticed, carbon wheels are very popular amongst road racers as almost all the pros use them. This has resulted in many people regarding carbon as the best material that can be used to manufacture bicycle wheels.

Carbon wheels are not just a thing for road cyclists, though, as more mountain bikers have started to replace their aluminum wheels with them. Wheels are probably the most important part of a bicycle as they directly after how well your bike will perform and how that riding experience will be.

The aerodynamics of carbon wheels vs aluminum wheels

One of the main reasons people choose carbon wheels over aluminum wheels is that their design performs better in the wind. Some of the best wheel manufacturers have studied how fast bicycles can go at wind tunnels and have found that carbon wheels are better at reducing drag than aluminum wheels.

Aluminum box section rims are not good at cutting through the air as their carbon counterparts and this makes it affect how fast a wheel can turn. An uneven flow of air eddy currents can make it easier for them to collide with other sections of the wheel and their force can slow you down.

Another positive point about the aerodynamics of carbon wheels is that they make your wheels become more stable. Since they have fewer imperfections and are better shaped, they create pressure on their sides when moving straight and this makes it harder for the wheel to make unnecessary turns.

Braking performance

When it comes to braking, carbon fiber wheels have a bad reputation, especially their earlier versions. The carbon wheel’s braking problem is quite common on long descents and trickier trails that require you to brake more often.

Most of the time, carbon wheel tires tend to blow due to heat caused by the friction between the brakes and the rims. This problem worsens when you have to ride in hot conditions as carbon is not that great at absorbing heat compared to aluminum.

This overheating problem is not something that has been reported in carbon wheels only. Some people have admitted that their tires blew due to their aluminum rims overheating but these instances are very rare.

If you are a big fan of carbon wheels, don’t worry, there are now brakes that are made specifically to reduce the risk of overheating rims. There are also techniques that you can read about on cycling forums that will help you brake more effectively and safely on carbon wheels.

How long carbon rims can stay true when compared to aluminum rims?

Unlike aluminum, carbon rims are more likely to stay true for longer because they are built to be appropriately round and solid. Since carbon rims are built to be round from the start, being in a circular formation does not strain them.

What makes aluminum rims strain to stay in position is that they begin as straight long rods in their manufacturing process. To become round, they are bent into circular shapes; most of the time, four of these aluminum pieces are bent at the same time.

Since aluminum rims get bent easily, people who prefer them over carbon rims claim that beating them into shape is relatively easy. 

Durability

When it comes to the durability of aluminum and carbon wheels, it is important to note that both materials can get severely damaged. However, carbon wheels are said to be stronger than their aluminum alternatives because they absorb impact better.

The ability to absorb impact in carbon wheels is what helps them spring back into shape even after being ridden repeatedly in rough terrain. Aluminum is also very durable and stiff but unlike carbon, this material is not adept at absorbing impact and creates microscopic cracks in wheels after every hard hit.

Over time, impact-induced microscopic cracks can create fatigue cracks on your wheel’s weak spots, such as the wades. These fatigue cracks can, in turn, result in a weaker frame and lessen your wheel’s stiffness and cause failure.

However, even though carbon is better at absorbing impact than aluminum wheels made out carbon break completely when they get hit super hard. Contrarily, aluminum wheels get bent after sustaining critical damage and can be banged into shape so you can continue with the trail.

Weight

People looking to shed a little weight from their bikes by switching to carbon wheels must be ready for a higher price tag. The common or cheap carbon wheel doesn’t weigh that much less than a good quality aluminum wheel and sometimes carbon wheels can be more expensive.

The fact that standard carbon wheels are not that light compared to aluminum wheels shouldn’t be a drawback. Lightweight carbon wheels are more likely to break after sustaining heavy impacts.

Centerlock vs. 6 Bolt Disk Brakes

For every biking enthusiast, it is important to know that the structure of the braking system determines the amount of power produced when braking. You must consider what attaches the brake rotor to the tire’s hub. Centerlock and 6 bolt disk brakes are good examples of equipment you can use in carrying out such activities. 

Centerlock disk brakes use rotors that move at high speeds and can stop when you apply a force to the braking handle. You can install them within a short while, even if it is the first time you will be doing so. They are less bulky and you will prefer them if you are a constant cyclist. You need a special key to connect it to the hub and the bike’s brakes to enable it to function.

6 bolt disk brakes use rotors to enhance movement but when they attach to the hub, it will take you less time to stop the bike tire. This is when compared to the centerlock type that is more efficient in speed. It uses a complex method of installation that will make you take a lot of time handling it. You will fall in love with it if you like riding for short distances. 

Conversion of a 6 bolt to a centerlock disk brake

Disk brakes create friction between a compressed pair of pads and a rotor using calipers. This action enables the shaft to stop rotating, bringing a vehicle or bicycle to a stop. This process occurs in a series from slowing down the motion of an axle until it reaches a point where it cannot move.

Installing the centerlock disk brake is a simple process. You will not have to try setting up 6 torques on the surface of the rotor. This is because it has its lock at the center point surrounded by metal made from steel. It has an inner ring that prevents it from bending. You can also replace the rotor when need be because it is easily removable.

The 6 bolt disk brake has a pair of rotors that prevent overheating and warping of your bike. You need to tighten the bolts to avoid uneven torque that leads to unequal brakes. The use of 6 bolts enables it to have many features that enhance how you brake. 

A 6 bolt rotor is compatible with a centerlock disk brake once you combine their features. It can slide to the hubs at the tires, creating an interface for mounting. 

This process needs you to secure it using quality equipment. Ensure you use a six-bolt washer, a circle clip, and a lockring to tighten it. This will keep it locked for long and you will not have the feel of using a ring with six bolts. 

How to fit centerlock and Shimano disk brakes

Fitting disk rotors in the right manner helps in preventing the malfunctioning of your bike’s brakes. You need to carry this out in order and with precision to avoid getting in danger. Here are ways to help you fit and remove disk rotors.

Begin by checking the condition of other components affecting the functioning of your bike’s brake. Look out for the seating of the wheels, the rotor, and the barrel change, and tighten the cable. When all is clear and in place, you can start the process of fitting.

You start by making the caliper mounting bolts loose to allow it to float. Adjust the outer pad counterclockwise and back to a single revolution to give a chance for future repairs. Then begin turning the pad adjuster within clockwise to enable the pads to lock against the rotors.

Continue to snug the bolts meant for caliper mounting against the rotor to ensure it aligns with the caliper body. Do not tighten it too much but wait till the pad gets aligned. Complete by loosening the pad adjusters on the inside and outside in even proportions. 

You should always aim at ensuring the caliper is parallel to the rotor and has equal openings on either side. Check for adequate lever grip by pulling, then releasing the brake lever a few times. A slow and adequate feel will confirm that everything is fine and you can stop the bike. Never forget to tighten the pinch and mounting bolts before trying out your ride.

Conclusion

The only difference between a centerlock and a 6 bolt disk brake is the method used to fit the rotors. They generally function in the same way, having to provide support to braking your bike. It is also easy for you to recreate the 6 block disk brake to a centerlock by following a set of guidelines. Ensure you pick on either of these sets, depending on the activities done with your bike. 

Best Bike Maintenance Book

Basic bike repairs need you to know what to handle in cases of a breakdown. You need a bicycle maintenance book to help in dealing with the situation. It will give you insights on the right tools to use in the specific part of the impact.

Having the right sources is crucial to ensure you properly repair the bike to make it last longer before incurring another issue. Here are some bike maintenance books to help you:

  • The Bicycle Guide to Complete Maintenance & Repair.
  • Park Tool Big Blue Book of Bicycle Repair. 
  • Zinn & the Art of Road Bike Maintenance. 
  • Just Ride.
  • Zinn & the Art of Mountain Bike Maintenance.

The Bicycle Guide to Complete Bicycle Maintenance & Repair

The Bicycle Guide to Complete Bicycle Maintenance & Repair will best suit you as a beginner in using a bicycle maintenance book. It provides information on general maintenance, whether you own a mountain, road, hybrid, cyclocross, or folding bike.

A clear explanation of setting up a place to repair your bike with a list of the right tools is what will introduce you to the first chapter. In the book, you will discover the many types of bicycle parts grouped down for a better understanding. This information is crucial in ensuring that you understand the mechanics and the working system of a bike. This knowledge will help you work on components that need attention to prevent early failure that may lead to a future crash.

To understand these components better, the book provides a detailed history of each part. This enables you to know how the bike evolved from a simple machine with a few basic components to what it is today. You become an all-rounded bike guru with the help of this book that gives an understanding of all aspects that make up a bike.

If you do not like having too many colors in sight, then this book best suits your bike maintenance needs. It lays down procedures in a black and white photo to show you what to expect when doing it alone. 

Pros 

  • It gives you knowledge of the general maintenance of a bike.
  • Provides detailed information on bike parts.

Cons

  • Contains black and white photo descriptions.

Park Tool Big Blue Book of Bicycle Repair

Park Tool Big Blue Book of Bicycle Repair is among the best bike maintenance books for intermediate mechanics. It is a great source of information for you when wanting to hit the nail on the head.

As the name suggests, the book provides Intel on the various Park bicycle tools needed for repair. You can look up for tools to buy even when in haste at the store with no clue of where to begin. The names of the equipment are in order of application point for easy understanding.

It informs you of the basic bike repairs like fixing a flat, tightening up loose bolts, reattaching loose chain, and rapping drop handlebars. Beginning with these is a step for you into recreating the bike to a complete overhaul. All you need is to get this book to start learning how to maintain bikes.

Information from this bicycle maintenance book is orderly to enable you to understand the processes involved. It gives clear descriptions of how to start the repair to the point of completion. In this stage, it tells you how the bike should function afterward and failure to it means you restart the whole process.

You will get an exciting experience going through this bike maintenance book even when resting after work. Be sure to share the thrill from it with family and friends to make the process fun.

Pros

  • Provides direct information on tackling the problem. 
  • It gives information on the company to buy maintenance tools. 

Cons

  • It is a bit overly detailed and the pros might find it a bit too much.

Zinn & the Art Road Bike Maintenance

Zinn & the Art Road Bike Maintenance is best to suit if you love using your bike on paved roads for competitions or exercising muscles. It gives you detailed information on how to handle basic repairs even in the middle of a deserted place. 

You will not have to worry about serious accidents experienced by a road bike with this best bike maintenance book. It gives elaborate information on how to carry out simple repairs right to the advanced one on a road bike. 

You get to have data on the different road bike components that are not present in other types of bicycles. This helps in focusing on specific points of interest to save on time rather than reading through a lot of fluff. The book gives detailed illustrations on how to work on each part for a better understanding.

You cannot miss a list of tools to use during repairs when going through this book. A detailed explanation of the usage of this equipment is in order of parts of the impact. It explains what tool to start with and which one to complete the repair.

If you are a racer, then owning this book gives you insights on preparing cyclocross bikes. It explains how to begin the process of creation with an elaborate guide on picking the right components for your racing bike.

Pros

  • It contains many elaborate repair illustrations.
  •  Best suit for road bike users with maintenance issues.

Cons

  • Only used for road bike repairs.

Just Ride

Just Ride is the easiest book to get that will explain how to handle a bike repair most easily. It does not need you to be a professional maintainer to begin the maintenance journey. 

This book will make you nostalgic because it uses bikes with full suspension and carbon fiber as basic examples. The old-fashioned way of repair is not that bad because it is the basis used by modern mechanics. This book will take you back in time, taking you on the road of becoming a good mechanic.

This bike maintenance book gives you a practical approach to handling basic repairs up to the difficult ones. It provides an elaborate explanation of what tool to use in the part of the impact and when to use them. These details are in a modest way, ensuring you take ample time handling the parts. This is important, especially if you are a beginner and a slow one.

It makes you enjoy the fun of cycling anytime and anywhere. You will not have to worry about calling an expert to handle a break down even when in a place far from a repair workshop. 

Pros

  • It gives non-technical information.
  • It uses the basics of maintenance from a historical point.

Cons

  • Requires you to think out of the box.

Zinn & the Art of Mountain Bike Maintenance

Zinn & the Art of Mountain Bike Maintenance will give you information on the process of repairing, taking care of, and upgrading a mountain bike. It features easy to follow steps that will benefit you as a beginner.

This book will enable you to learn of the latest technology in bike maintenance, ensuring you remain updated. It will help you even after purchasing a new bike and incurring an accident in the mountain thickets with its advanced information. Going through it often enables you to grasp basic concepts of mending and you will stop carrying it around on an adventure.

It gives an elaborate explanation of the parts of a mountain bike and the various instances of distraction. Moreover, it explains how to handle the affected part alone in a detailed procedure explained in most of the pages. By the end of some years of going through it, be sure to be a guru like a bike mechanic next door.

Do not worry if you are new to handling a repair alone. Order this best bike maintenance book and get ready to begin this awesome journey. It will give you knowledge on not only repair and maintenance but also recreating your mountain bike from an accident to a newbie.

Pros

  • Gives correct information on the maintenance of mountain bikes.
  • It informs on changes in the technology of mountain bikes.

Cons

  • Not preferred for use for non-mountain bike repairs.

What to consider when choosing the best bike maintenance book

It is important to know what to look for in a book for guidance on bike maintenance. Here are some key points to note.

The type of bike

You may own a road, mountain, or hybrid bike, which needs different ways of maintenance. Get the right book to assist you to handle the specific type of bike that needs repair.

Your level of experience

Buy a book that falls in line with your level of experience in handling bike maintenance. There are those meant for beginners, intermediates, and professionals. Understand and accept your skills, then go ahead and choose the right book for you. 

Conclusion

Bike maintenance does not need to be hard to do it alone but it needs following a set of guidelines. Getting the right book gives you the appropriate knowledge of how to carry out the procedure and it gives information on the specific tools to use. Do not shy off from getting out of the comfort zone and start handling bike repairs on your own.

Best Mountain Bike Shock Pump

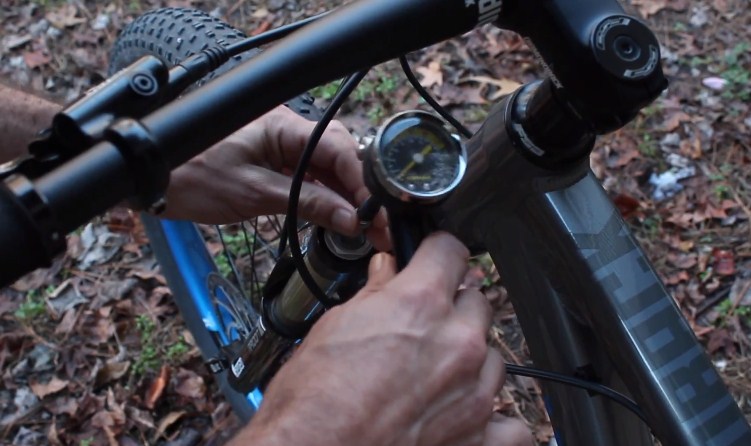
Pressure in the fork or shock is greater compared to that of any part on the bicycle especially the tires. Using the normal bicycle pump will not work to put pressure on these parts. Mountain bike riders should ensure to have the best shock pumps that will keep their tires soaked up with impact.

Here are a few of them that will help in the maintenance of your bicycle through the perfect change of air pressure inside the spring:

  • Fox High Pressure Shock Pump
  • RockShox High Pressure Shock Pump
  • GIYO High Pressure Shock Pump 
  • Fox Racing Shox Digital Pump 
  • Topeak Pocket Shock DXG Pump

Top 5 Best Mountain Bike Shock Pump

#1. Fox High Pressure Shock Pump

Fox High Pressure Shock Pump is a 7.2 pounds shock pump that mountain bike riders love to use due to its portability. You get to move around without feeling any added weight to your course. 

It is two inches wide to allow for a greater up and down movement through pumps handle. This distance ensures you maximize the space while you use less force. It also has a length of two inches that is great because an increased distance of application of force helps in reducing effort applied. 

The presence of a rear gauge enables you to measure the amount of pressure exerted on the fork of the bicycle. It has a wide range of calibrations that ensures you are free to choose the amount of pressure that will suit your bike. Always base your pressure input on the quantity of weight that the bicycle carries. 

The air release valve is close to the pressure gauge to increase efficiency while pumping. The short distance reduces the loss of pressure by the collision of air particles along its path. 

The pump works best in inflating mountain bikes that have Schrader valves with enough clearance for coupling to engage the thread. While pumping, you get to exert a force that generates pressure through the collision of air particles in the pressure gauge. This pressure gets to accumulate and to release it in bulk you need to have a shock pump with a narrow opening. The smaller the opening, the greater the pressure output.

Pros

  • A narrow valve opening.
  • It is portable.

Cons

  • Lacks a rubber outer casing on the body.

#2. RockShox High-Pressure Shock Pump

RockShox High-Pressure Shock Pump has a length of 5.9 inches that enables you to push and pull the handle with ease. This increased length is to your advantage because it reduces the amount of force you will apply. In turn, it generates a lot of pressure once you compress the inner air. The width and the height are 1.2 inches, which ensures the perfect fit on the bike frame. 

It is less susceptible to shock vibration and moisture that are key factors in reducing a shock pump’s life cycle. This makes it durable making you use it for more than two years. This is if you are a seasoned mountain bike cyclist.

It has a relief gauge adapted to control the amount of pressure generated in this system. This safety valve reduces pressure build-up that may lead to malfunctioning of the bicycle. 

The relief valve releases excessive pressure that always builds up in the bicycle. It tends to release elevated pressures before they overwhelm the normal bike functioning. They respond to a rapid rise in pressure by releasing it to the valve. 

This high-pressure shock pump is lightweight and transported anywhere you go. Its lightweight material matter that is strong to ensure it does not break . 

It always closes up to the valves stem before it opens the valve. This helps in preventing excessive air loss from the bike tire to the surrounding. It balances the quantity of air by ensuring it maintains the little volume of air in the air chamber stored in forks and shocks. It gives out a large amount of air pressure as compared to a tire pump.

Pros

  • It is durable. 
  • It has a good function-able safety valve.

Cons

  • Designed for use as a bicycle shock pump and not a tire pump.

#3. GIYO High Pressure Shock Pump

Giyo High Pressure Shock Pump designed to inflate the air fork or rear suspension of Schrader valves. It uses a maximum of 300 Psi, which is not suitable for your bike tire. This high pressure makes the tires sturdy leading to a firm grip on the ground. 

It has a pump with a lever lock on its head that ensures small amounts of air are not lost to the surrounding during a disconnection. This unique nozzle ensures you get the greatest efficiency from using it. You would not have to mind about the amount of effort you put in place to generate pressure getting lost in vain. 

It is bigger having to weigh 8.5 ounces making it the best suit for you to carry it when going for short mountain rides. It has a length of 9.8 inches that is great for holding with both arms. It reduces the amount of force you will need to apply to generate internal pressure. 

It is 3.9 inches wide and high and can fit into your mountain bike’s frame. It will not lump out and collapse when you encounter a bend or when you are riding down the hill at high speeds. 

Rubber is the main material that makes up the handle. It helps in insulation and cushion vibration experienced by your hand when pushing and pulling. It also keeps your hand glued to it due to its gripping effect. When your hands get slippery, rubber tends to keep them on hold for a longer time.

Pros

  • It functions best with Schrader valves.
  • Presence of a pump with a lock at the lever head.

Cons

  • Not portable to longer distances.

#4. Fox Racing Shox Digital Pump

Fox Racing Shox Digital Pump is a mechanized shock pump that uses a replaceable battery to power it up. This digital display is a replacement of the normal mini pump found in most of the shock pumps. It only functions when the battery in use is a single CR2.

It has an included button that lets air out to ensure you set it up. Battery power conservation takes place by the automatic power off button located on its length. It shows pressure in the form of psi, bare, and kilogram per square centimeter. Its accuracy is 1 psi of normal pressure, which is an estimation that can vary depending on the difference in altitude. 

It has a rubber hose mounting onto its body to increase your hand’s grip on it. Its outer covering has a 360-degree pivoting head and a sturdy valve chuck. This ensures it remains durable to keep it in use many times. 

It gets a high advantage over other digital pumps due to its ability to have a smooth pump action. Its pressure ratings are also top-notch because a battery powers it. You need to keep on factoring an added 3 psi worth of pressure every time you reconnect it to the valve and begin the inflation process. 

It is 14.8 inches long to increase surface area for you to lay one of your hands while pimping. It is 3.8 inches high and has a width of 2.8 inches. Its weight is relatively portable to ensure you get to enjoy your ride without having to worry about the extra helping hand you got at the frame.

Pros

  • It uses a replaceable CR2 battery.
  • Presence of an air regulation button.
  • It enables a smooth pump action.

Cons

  • It is relatively portable.

#5. Topeak Pocket Shock DXG Pump

Topeak Pocket Shock DXG Pump as the name suggests is a portable shock pump that is sure to save you a lot of energy. You can place it in your pocket or attach it to the bike’s frame. Establish what will best suit your comfortability before deciding to place it in the easiest accessible place. 

It has a dial gauge that is easy to interpret and it measures pressure up to 360 psi per 24.8 bar. It has a precision fork and a shock pump that enables you to pump in the air that generates pressure to counter the shocking effect of the bike.

Close to the handle is the air release button. Its position along its length enables it to let out the air in the form of pressure after a pump. The presence of a pressure-Rite connector gives you the chance to set the pressure with ease. It also eliminates the loss of air incurred during the disconnection of the system.

It has a flexible hose that relieves the valve off stress coming from the valve stem. Its handle is rubber made to ensure that you maintain a grip of it. The barrel has an aluminum making that gives it its strength but maintains to have less weight. It tends to shun away from corrosion and maintains a perfect outward appearance that will please you throughout your ownership period. 

It weighs eight pounds, which is half as much as the average shock pump weight. This makes it among the lightest shock pumps you will ever get. It has a length of ten inches, a width of four inches, and a height of 2 inches. Due to its short stature, it has an extended barrel that enables you to reach to desired pressures.

Pros

  • It can fit into your pocket.
  • Presence of a flexible hose that is a stress reliever.
  • An easy to interpret dial gauge. 

Cons

  • It requires a firm grip on the body due to its short stature.

What to consider when choosing the best mountain bike shock pumps

Investing in good quality equipment helps you save on future time and money. You need to understand how bicycle shock pumps work to be able to get what you want. Follow these tips on what to consider before purchasing a shock pump for your mountain bike.

The gauge

You need to measure the amount of pressure you will be putting in your bike so you need to have the perfect gauge. Get large gauges that are readable with long needles and accurate prints that dismiss errors. Use the sag measurement system when utilizing a good gauge.

The body

The body of the pump is the most crucial part of the whole tool. Without it, you would not have to use it. Get a bike shock pump with a body made from a strong material such as aluminum that ensures its durability. Often go for the lightest weight, ultimate sturdiness, and corrosion resistance.

The handles

You cannot pump with ease once the handle is rough or slippery. Get a bike shock pump with a handle made from rubber or any rubber-like materials. This ensures you are comfortable while you work on inflating and you do not get to lose grip of the handle.

The hose

All shock pumps must have a high-pressure hose that is also flexible. Make use of shock pumps with longer handles that offer an increased surface area for grip. This will help you reduce the amount of force you will use while pumping. 

The valve head

Most mountain bikes use the Schrader valve because their tires need low pressure for easy movement. Get a valve with an easy to remove the core to enable you to do the inflation swiftly. You will only need to unscrew the rubber cap at the top, which is simple.

The bleed valve

Bleed-valves help in fine-tuning your suspension especially when there is too much air. It relieves backpressure in the compressor ensuring the prevention of compressor stall and surge. Get a pump with a basic button to control the rate of airflow within it. 

Conclusion

A good bike tire grip enables you to increase control and reduce fatigue. You need the best shock pump to tune the rear suspension of the mountain bicycle Do not forget to add excessive pressure when you inflate the bicycle tire. When the tire gets too hard, you tend to slow down your cycling. This is because the tire will tend to vibrate and bounce back increasing rolling repulsion that causes an uncomfortable ride.

Can You Use a Presta Tube on a Schrader Rim?

Bicycle tires and valves play a significant part in ensuring you have a successful ride. But when encountered by an emergency, you can mismatch bicycle tubes and valves. Bicycle tires have different valves which include the Schrader and Presta valves.

Presta tubes are sometimes used in Schrader rims for such instances. Here’s how the two can be compatible to ensure you keep riding that bicycle.

What are Presta tubes and Schrader rims?

The Schrader valve is like those used in car tires and expansive bicycle models. They have a wider diameter and you need to wrap them in rubber before attaching them to wheels. It has a threadlike outer wall to accommodate a pump head or a cap. A pin located at the center that has a spring-loaded check valve controls the flow of air.

The Presta tubes are slender and used by inexpensive bicycle brands. Their width is half that of Schrader rims and it’s made from metal. A few of them have threads towards the bottom while the rest have tapering towards the top. This ensures the easy opening of the textured nut at the top by unscrewing.

It seals when the pressure in the tube and tire balances. They have a removable core even for the tubeless bikes.

Can you use a Presta tube in a Schrader rim?

You can use a Presta tube in a Schrader rim when encountered by an emergency fixation. A Presta tube can move in the wider Schrader rims to reach the bottom. The threads at the bottom speed up its move to the base of the valve. Ensure that you use a valve nut to secure the tube to the rim.

Ensure that the rims of the Schrader are wider than the Presta tube for the valve hole to widen. Take note that when you try this out, ensure your bicycle tires sit at low pressure. To ensure this get a valve adapter made from rubber or metal meant to reduce the size of the valve hole.

But, this isn’t advisable since the tubes and tires move on the rim. They are prone to get pinched between the tire and rims. But having a smaller tube will be compatible with a larger valve.

How do I use a Presta tube in a Schrader rim?

It’s an essential skill for every cyclist to know how to pump their bicycle. They need to know the type of pumps, the pressure to use, and the type of valves they are using. In a case where you use a Presta tube in a Schrader rim, you need to take precautions. As a cyclist, it’s amazing to have your tires gripped to the ground when pumping it to avoid punctures.

Use a nut valve to convert the rotating motion to a downward movement needed to screw in the Presta tube. This ensures the security of the tube to the Schrader rim. It also helps in avoiding the loss of inner pressure to the surrounding. Don’t worry when you own a tubeless tire because it uses a special rim and tire that seals air inside.

Always ensure to pump in the accurate pressure meant for your bicycle tires. Do this before attaching the different tubes and rim.

What are the consequences of using Presta tubes in Schrader rims?

Schrader rims are like Presta tubes in having an equal circumference at the top and bottom. You need to be keen when unscrewing the stem nut to prevent the removal of the entire core in the system. It ensures air isn’t let out of the tire.

They have a few differences which are due to their usage in different bicycle types. The application of pressure in the inner pin allows airflow in one direction. The Presta tube lacks a check valve and depends on the pressure difference applied to the tube and tire.

Conclusion

Every bike rider is prone to get caught up in an entanglement where they have to use dissimilar tubes and rims. In this situation, you need to be careful about how you install the Presta tubes in Schrader rims. You also have to be knowledgeable enough to know the terrains in which you’ll ride your bicycle. It helps you avoid accidents arising from pressure differences within the bike tire.