
Can You Use Clipless Shoes on Flat Pedals?
Once you select a bicycle that’s suitable for your needs, choosing the right shoes will make a big difference to your riding experience. Your feet help you to build up speed, navigate obstacles and give you control of your ride. This is why wearing the right shoes is so important.
Manufacturers carefully design shoes for particular riding experiences and types of bicycles. They need to be comfortable to wear and yet effective in making every stroke of the pedals effective.
Flat pedal shoes
If you ride casually and you’re cycling short distances, a flat rubber pedal works fine. This is the standard bicycle pedal that has a flat surface and is compatible with any kind of shoe. If you use clipless shoes on flat pedals, they probably won’t offer you as good a grip as wearing flat-soled rubber shoes.
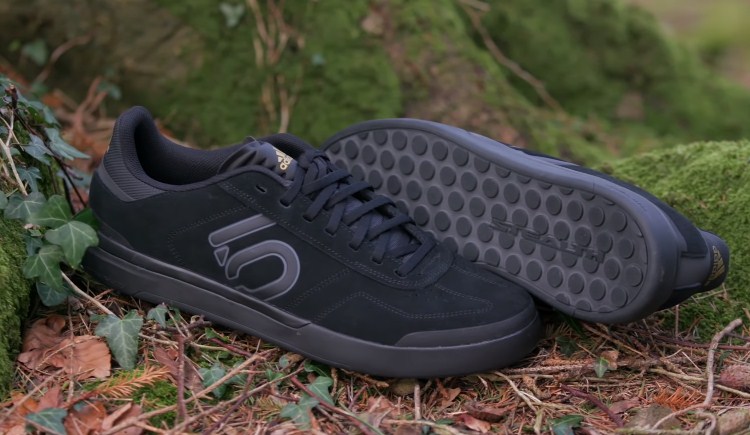
It is often quite difficult to tell the difference between shoes made specifically for flat pedals from standard shoes. They do, however, usually have a tough, quite rigid sole to help keep your feet steady and in the best position for energy transfer. Grippy outsoles help your feet to stay in position on the pedals.
Five Ten has become a dominant brand for these flat shoes and although they are fairly costly, the sole is stiff enough for riding, sticks to the pedals very well and has enough flex for walking.
As a beginner rider, you can wear flat shoes to give you a chance to focus on fundamental techniques without having to worry about clipping in and out of pedals or ending up on the ground when you can’t free your feet in time. It takes practice to become accustomed to riding with clipless shoes and pedals.
What are clipless shoes?
Clipless shoes use a cleat attached to the sole to clip into your pedals. They may take a bit of getting used to but they offer many advantages. They help you to make the most use of your energy as the foot-to-pedal connection is better.
You use your whole pedal stroke, including the upstroke. You have more control over your bike and can focus on your training without having to adjust your feet every few strokes of the pedal.
How do clipless shoes work?
The sole has a pattern of holes that accept specific cleats. Clip-in pedals are compatible with a specific pattern. All the parts must have the same pattern – typically 2-bolt or 3-bolt cleats – or they aren’t able to work together.
Shoes with 2-bolts are used for everything from mountain biking to gravel riding. You can walk easily in these shoes because the cleats are recessed. Shoes with 3-bolts have exposed cleats, so they are more difficult to walk in and are mostly used for racing and road riding.
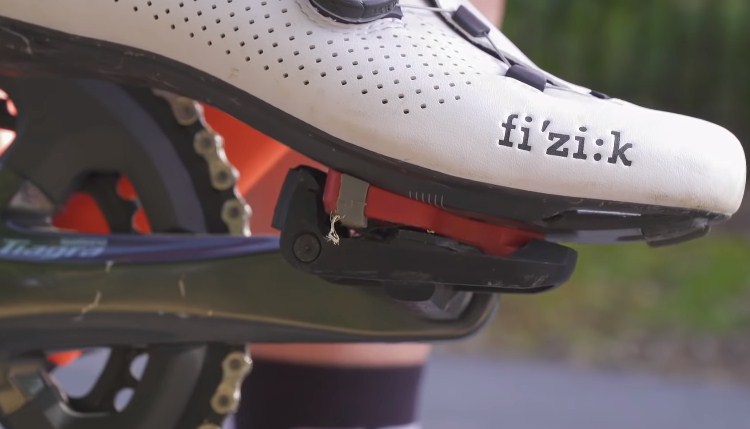
A clipless system
If you cycle more seriously, where you ride, the distance you cover and your speed changes. There’s more risk of your feet slipping off the pedals and even if they don’t, you waste energy as they change position on the pedals. The ideal position is to have the balls of your feet on the center of the pedals.
Using a clipless system helps many riders to feel more confident and powerful on their bikes. A clipless system consists of the pedal, the cleat and the sole. When the system is engaged, your feet are connected to the pedals and won’t come off.
To get out, you swing your heels to the outside, and the pedals release. Because your feet are locked into the pedals, it gives you more power while accelerating and climbing and more control for maneuvers such as hopping obstacles if you’re riding off-road. You can get your feet in and out quickly with practice, so you can land safely if you need to dismount in a hurry.
The shoe you pick must be compatible with the pedal system your use. Most quality shoes work well with major pedal systems but you do get mismatches every now and then and you want to avoid those.
A final word
You want to wear shoes that will improve your cycling performance and keep you comfortable and safe no matter where you ride. Flat pedal shoes are fine for certain types of riding and grip better than clipless shoes on a flat pedal. If you’re cycling off-road, using a clipless system is the best way to keep your feet on the pedals when you’re flying downhill and dodging obstacles.

Are 8 and 9 Speed Cassettes the Same Width?
Bike component manufacturers come up with new components with new specifications every now and therefore, the market is full of various options.
A wide variety of products makes confuses you, especially when the manufacturers some parts aren’t compatible with other components of your bike. Whether you are a pro-level biker or a beginner, it becomes difficult to decide.
This is why cyclists need to know even the minor details of the bike’s components as it helps to maintain the bike nicely.
Same width, different spacing
When it comes to bike parts, one of the most confusing things is cassettes, especially since these come with different speeds. Here are some details for you to know when you’re thinking about whether you should get an 8-speed or a 9-speed cassette for your bike:
- Both 8-speed and 9-speed have the same freehub width, while the 7-speed is a bit narrower.
- The spacing of gears of 8-speed and 9-speed differ.
- You need a spacer behind a 7-speed cassette for it to fit on an 8-speed or 9-speed freehub.
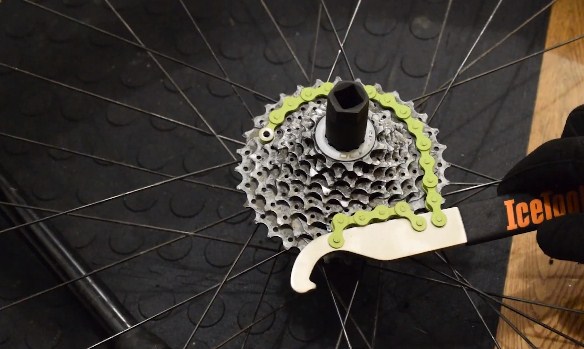
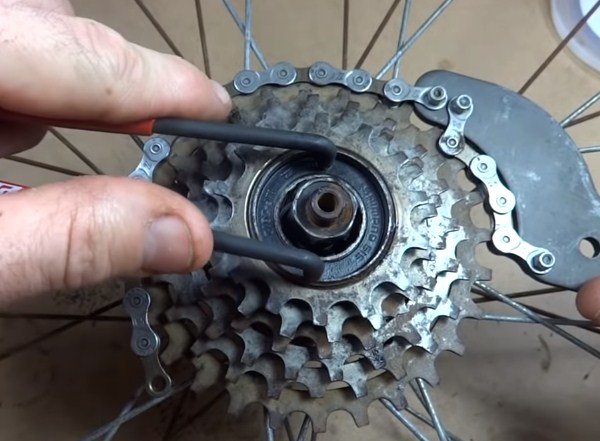
The cogs of these cassettes have the same width, although the spacing varies. This means that a 9-speed chain could work adequately with an 8-speed cassette.
This is also the reason why 9-speed chains aren’t very durable. The outer width is a bit narrower, while the inner width is the same. This means that the plates on the chain are a bit weaker and thinner.
Sometimes, the difference lies in the brand
Sometimes, the difference lies in the brand. For instance, the 8-speed cassettes of the Campagnolo and Shimana brands don’t have the same spacing. This means that it’s quite challenging to get good indexing when you use an 8-speed wheel from Campagnolo with a cassette from Shimano, and vice-versa.
For the Shimano brand, their 9-speed cassettes have an extra cog added to the 8-speed cassette, while the overall width remains the same. It has a reduced gap between the gears and as such, it requires a narrower chain. The same thing goes for the 10-speed where it still has the same width as an 8-speed cassette. This makes the 10-speed slightly narrower.
For the speed systems in the 7, 9, and 10, the sprocket spacing of different brands doesn’t differ significantly, so it doesn’t cause many difficulties when used. To ensure a perfect match, you can do the following:
- Substitute your spacers
- Use alternative cable routing
- Use a special pulley adaptor
Estimated widths of different bike components
The width of the cassette you need for your bike also depends upon its compatibility with the other parts. Depending on what you need, you may want to consider researching the specific cassette you plan to buy as the values might vary slightly. To give you some idea of the measurements of different bike components, here are some estimates:
- For Spacer Width: 8 Speed (3.00mm), 9 Speed (2.56mm)
- For Cog or Tooth Width: 8 Speed (1.8mm), 9 Speed (1.78mm)
- For Chain Width: 8 speed (7.1mm), 9 speed (6.6 to 6.8mm)
Other things to consider when looking for speed cassettes
Along with compatibility, you may also want to look into the dropout spacing at the rear. For example, if you have a 126mm bike, you should know that 8-speed and 9-speed need 130mm.
Additionally, if your bike has a frame made of aluminum, some people would warn you against the stress caused should you use a wider wheel. As such, you may need a new chain, new shifters, and maybe even a new derailleur on the rear.
Conclusion
The 8-speed and 9-speed, even the 10-speed cassettes can all fit in the same hub. This simply means that if your bike is an older model with 8 gears on the rear, you may opt for an 8, 9, or 10-speed without needing to change your bike’s rear wheel. The reverse way works too.
With this information on-hand, the next thing you may want to consider is the need, if any, and the compatibility when changing other components of your bike. Research everything that you need to know before starting to work on your bike for the purpose of maintenance. Do this to lessen your risk of facing issues.

Best CO2 Inflator for Your Bikes
As a cyclist, you don’t want to get stranded somewhere because of a flat tire. In such a case, you can either walk home, hitchhike or call a friend to pick you up. You can avoid this kind of situation if you carried with you a CO2 inflator.
This is an affordable, lightweight, and small tool that pumps up flat tires with minimum effort. The quick release of air into the flat tire saves you precious time. Best of all, these devices aren’t that expensive. You don’t even have to be a professional cyclist to own one.
With a high-performance CO2 inflator, you can enhance the quality of your experience as it gives your bike the appropriate tire pressure. Read on to choose the best CO2 inflator out of the many products on the market.
What to Look Out for When Getting the Best CO2 Inflator
In the past, people only used a CO2 inflator because of its convenience. Today, however, it has become a very popular device for those who need quick inflation. If you decide to get rid of your pump and you need a space-saving, quick way to inflate your tires, here are the pointers for you to consider.
Canisters and Canister Wrappers
Although CO2 inflators mostly come in canisters, not all of them are the same. For one, some have threaded tips whereas others are very smooth. Either of these is okay. Just make sure you purchase compatible canisters.
When you opt for metal canisters, remember that they reach a freezing point as quickly as they discharge the gas. If you used these canisters with bare hands, your fingers might get stuck, which, in turn, causes severe discomfort.
To avoid this from happening, you can wear gloves. Better yet, put a sock over the canister while using it. This serves another purpose – it stops the metal bottle from rattling while you’re on the road. You may notice that in some CO2 inflators, part of the design ensures that the kit covers the canister completely.
Ease of Use

All CO2 inflators offer superb ease of use, especially during emergency cases. This ease avoids the loss or damage of cartridges because of poor connections which can be very costly. Before riding your bike, make sure that you know how your CO2 inflator works so that you can use it easily and quickly.
You don’t have to spend too much time figuring out how the pump works, especially when you’re cold, tired, and stranded. Often, these are the times when you’ll get a flat tire. This makes ease of use an important factor to consider.
Weight and Durability
If you take your CO2 inflator with you every time you go biking, it takes up crucial space in your pocket or bag. Additionally, you will also drag the extra weight down and up each hill.
With a small CO2 inflator, it becomes more convenient and easier because of its small size and affordable price. As for durability, just purchase a durable inflator – preferably one that’s built to last for years to come.
Pressure Tap or Lever
You may want to consider a CO2 inflator that comes with an off/on valve or a pressure tap that allows you to apply just enough pressure. This feature also means that you won’t have to waste a canister after each use.
Although this type of CO2 inflator is a bit more costly, it’s more economical in the long-run. With such a device, you can also add a little more air before fitting the tire, thus, reducing the risk of pinch punctures.
Top 5 CO2 Inflators
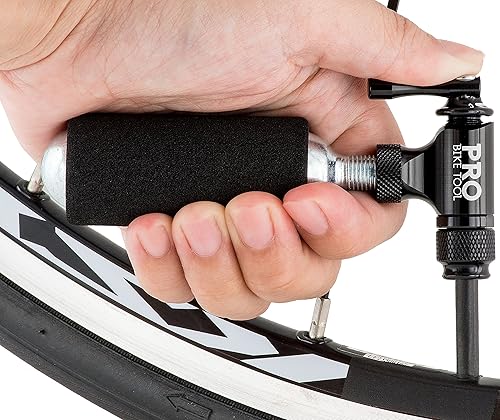
1. PRO BIKE TOOL CO2 Inflator
This PRO BIKE TOOL CO2 Inflator can inflate your tires in a matter of seconds with its 1-Turn Valve System. The control level operation regulates the release rate of carbon dioxide for inflation that’s controlled and precise. This device has a twin-valve head that threads into Schrader or Presta valves so you don’t need to switch valve heads.
Its compact size fits perfectly for keeping in a small bag or a pocket. The inflation head has compatibility with threaded cartridges of different sizes. There isn’t any danger in getting your fingers frozen when using it.
Although the PRO BIKE TOOL CO2 Inflator is a bit pricey, it’s more dependable than cheaper ones which inevitably fail, especially when you need them the most. Its superior quality ensures that you will have an enjoyable and safe ride.
Pros
- Includes a foam sleeve made of rubber EVA material to prevent leaks.
- Made of high-quality machined aluminum alloy material with precise and durable parts.
- Comes with a guarantee of a replacement or refund.
Cons
- In some cases, unscrewing the inflator attachment tends to unscrew the valve along with it.
2. Genuine Innovations G20315 CO2 Inflator
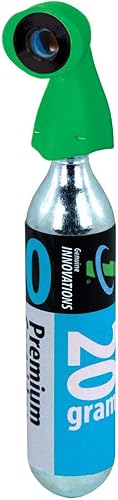
The Genuine Innovations G20315 CO2 Inflator uses an easy twist-to-inflate technology that offers easy, controllable, and quick carbon dioxide inflation. Simply thread a cartridge into the CO2 inflator, keep tightening it until you pierce the cartridge, press the nozzle into the valve, and twist the cartridge gently to release the gas inside the tire.
With this device, it only takes a few seconds to inflate your tire for you to ride your bike again. You can use the device with Schrader and Presta valves. Its construction is of a lightweight metal alloy with a compact design so you can carry it with you without it weighing you down.
The Genuine Innovations G20315 CO2 Inflator has a push-to-inflate technology that enables one-handed operation and controlled inflation. It even comes with its own threaded cartridges.
Pros
- Compatible with different threaded CO2 cartridges except for the 45g one.
- The only inflator that can fit inside aero and disc wheels.
- Includes a 20g threaded cartridge and has compatibility with Schrader and Presta valves.
Cons
- Some bikers report of inconsistencies with the product’s durability but then you don’t really expect it to last for years so not a major worry.
3. LEZYNE CO2 Inflator
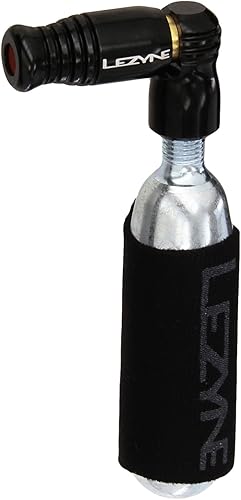
The LEZYNE CO2 Inflator only works with threaded cartridges and it’s easy to use. Just tightly screw in the cartridge, screw the head into the valve, and push the head in to release the air.
You can also use this device on Schrader and Presta valves. It offers easy gas flow control and has a jacket for protecting hands from getting frozen when the canister is in use. It’s highly durable with its CNC-machined aluminum construction.
The LEZYNE CO2 Inflator has a Trigger Valve Operation that allows for more precise and easier controlled inflation. The head presses into the valve for quick engagement and it’s compatible with all threaded cartridges.
Pros
- Compatible with threaded CO2 cartridges.
- Compatible with Schrader and Presta valves.
- Has a sleeve made of Neoprene material to keep your hands from getting cold while you use it.
Cons
- Some minor issue with air leaks.
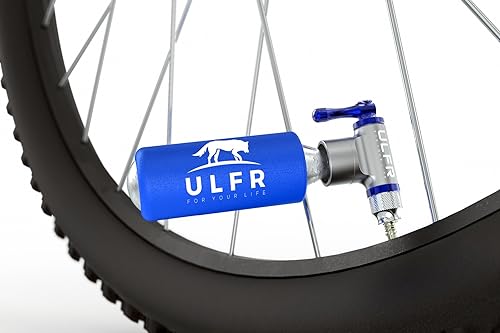
4. ULFR CO2 Inflator
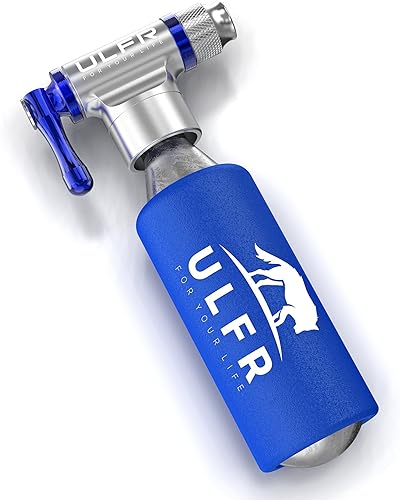
When you carry the ULFR CO2 Inflator, you don’t have to worry about flat tires while on your way to the office or doing your daily ride. This handy kit includes a CO2 Inflator, an insulated sleeve, six tire repair patches, and a ball needle.
Should you have a flat tire, you can easily use the ULFR CO2 Inflator. Seal the 2-1 valve head completely into a Schrader or Presta tire valve, turn the lever in a counter-clockwise direction slowly up to 90 degrees until you reach the desired pressure level, then turn the lever in a clockwise direction back to the OFF position.
As a gesture of the manufacturer’s authenticity, they have included free tire patches and a convenient ball needle for you to use for different ball games. These are very handy items if you’re into sports too.
Pros
- Includes a ball needle and bonus patches too.
- A handy device that’s lightweight, compact, and highly efficient.
- Comes with a warranty that lasts for a lifetime.
Cons
- A minor issue of air leaking out while using has been reported by bikers.
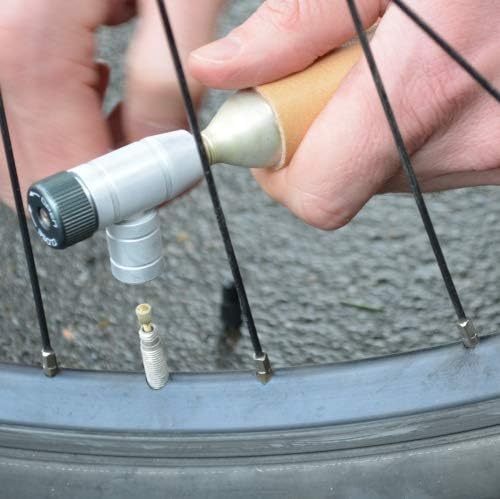
5. Portland Design Works CO2 Inflator
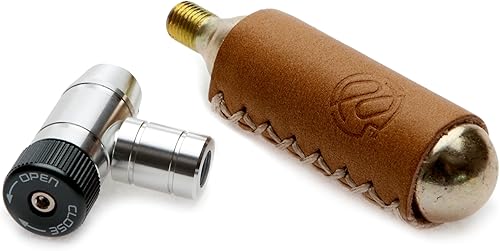
The Portland Design Works CO2 Inflator Includes a 16g CO2 cartridge with a sleeve made of stitched leather to protect your hands and reduce the noise while you ride. The leather sleeve only comes in one color.
This device has compatibility with both Schrader and Presta valve types, as well as, threaded cartridges. The Portland Design Works CO2 Inflator features a control knob that allows you to regulate the speed of airflow for more precise results. It’s also made of highly durable alloy to ensure a longer life.
Pros
- Has a leather sleeve that’s dyed using natural waxes and oils.
- Made with a highly durable alloy construction.
- Comes with a lifetime warranty against product defects.
Cons
- Gave out a loud noise but it’s reported to have been taken care of by the manufacturer.
What is a CO2 Inflator?
A CO2 inflator is a portable and lightweight tire inflation equipment that you can use as an emergency device in case you get a low or flat tire while traveling. Generally, a CO2 inflator consists of two pieces – an inflator which is also referred to as a nozzle, and a CO2 cartridge that contains carbon dioxide gas.
The flow of air in some CO2 inflators can be manually controlled, thus, making it possible to block the flow of air. However, other models don’t have this feature. The CO2 cartridges for this device come in varying sizes including 12g, 16g, and 25g. The design of the smaller models allow them to fill tires up to 90 psi while the bigger ones can provide up to 120 psi.
The CO2 canisters for CO2 inflators come in either smooth or threaded types. When it’s time to use the inflator, you have to screw the adaptor head on the cartridge then direct the inflator onto the tire’s valve. For the threaded type, you have to twist the inflator onto the cartridge.
For the non-treaded type, you just have to push it down. Do these steps to quickly transfer pressurized CO2 from the cartridge to the tire. Using a CO2 inflator is a convenient inflation option but the cartridges are only for single use. You can use the inflator repeatedly and as such, you have to purchase one that’s highly durable.
The CO2 inflator is a convenient tool to carry because of its small, lightweight, and compact design. You can bring it with you when you go biking without having to affect its quality. You can get rid of the frame pump and buy yourself a highly efficient, and portable CO2 inflator.
How does a CO2 inflator work?
A CO2 inflator is a convenient device that helps inflate your tires in case of emergencies. Because of its size, it’s handy to carry inside your backpack, pouch or pocket. Moreover, this is more lightweight compared to frame pumps that are a lot bulkier.
Tire pressure has an effect on the quality of your ride and this makes the bike pump essential for every rider. However, the problem with bike pumps is that they weigh a lot and this feature can hamper your smooth ride.
The CO2 inflator effectively deals with this issue because of its aforementioned qualities. But before you purchase a CO2 inflator for yourself, you first have to know how it works.
There is a canister inside where the CO2 gets compressed. To transfer this CO2 from the cartridge to the tubes of the tire, you need an inflator or nozzle. Cartridges are for one-time use and this means that you must perform the transfer correctly on your first try.
Verdict
A CO2 inflator is a compact, lightweight, and portable tool that’s reliable and easy to use. While it’s true that you can only use the cartridges once, they are very useful to get you on the road again both quickly and effortlessly. If properly used, a CO2 inflator can guarantee a smooth ride after using it in a low or flat tire emergency. It truly is a must-have device for every biker.
If you decide to get yourself a CO2 inflator, you have to choose the best one. There are so many CO2 inflators in the market it can be a challenge to narrow down the choices.
The inflators we have presented here should provide you with some insight into what makes the best CO2 inflator. Make your choice. You can’t go wrong by choosing any of the options we have mentioned above.

Why is it Hard to Pedal My Bike?
Since cycling is an endurance activity, you need the right bike to make it easy on your body to cope with the rigors of the road. As a cyclist, you can’t perform at your best if you feel that it’s very hard to pedal your bike.
Luckily, there are several ways to deal with this problem. If this is a problem you’re dealing with right now, there is still hope. By dealing with issues or getting one of the best bikes on the market like the Tommaso Imola Endurance Aluminum Road Bike, you can improve your performance dramatically.
How do bicycles work?
No matter how much you weigh, the frame of your bike should be strong enough for it not to buckle or snap as soon as you ride on it. Ordinary bikes have frames made of inexpensive but strong alloys based either on aluminum or steel.
But the bikes used for racing and cycling are much stronger and are more likely to be of carbon-fiber composites. Although they are a bit pricier, they are much stronger, rustproof, and lighter.
Bike frames aren’t designed to be completely rigid as this could result in a ride that’s much less comfortable. All bike frames bend and flex a little to absorb some amount of shock when riding, although manufacturers consider other factors to ensure comfortable rides.
Ultimately, it’s the bike’s wheels that support your whole weight – but in a unique way. If the bike’s wheels were of solid material, they would get squashed down as soon as you board the bike as they should push back up to support your weight.
However, just like the Schwinn Vantage Hybrid Road Bike, most bikes today have wheels that are actually made of a thin rim, a strong hub, and a number of spokes with high tension. These spokes make the wheels lighter, stronger and have the ability to reduce drag compared with wheels made of solid metal.
Why is it hard to pedal a bike?
Generally, cruisers like the Schwinn Sanctuary 7 Cruiser Bike are more difficult to pedal than road bikes, but if you really feel it’s much harder, then there are some adjustments that you can make. First, check the brakes to make sure they aren’t the reason for dragging you down.
There might be a need for an adjustment. The reason can also be that the tire pressure is significantly lower than what it should be. Check the tire and brakes pressure. Also, take a quick peek to see if your bike’s tires aren’t rubbing against the frame.
The issue might also be a rusty chain. In such a case, one thing you can do is to lubricate the chain – but use only chain lube. For instance, WD-40 cleans the chain but it has minimal lubricating value.
If you use motor oil, this accumulates on the exterior of the chain and eventually, collects road grime and dirt. This is why you should only use a proper bike chain lube – one that cleans and offers an anti-static effect, meaning it won’t attract grime or road dirt.
Tips for making it easier for you to pedal
Friction causes materials to wear out. In bicycles, one of the most common causes of friction is a rim that rubs against the bike’s brake pad. You can easily solve this problem by making adjustments to the brake.
That is unless your bike has a bent rim, which makes it harder to fix. Adjusting the wheel bearings requires some practice and special tools. It’s recommended to skip your DIY plans and bring your bike to a mechanic.
A wheel rubbing on its frame can also be a source of friction. This can happen because of a bent rim, frame or fork but also because of a misaligned wheel. This issue typically happens with older bike models that have frame eyelets to allow for some adjustment of the chain tension.
A rear wheel axle that isn’t tightened on the frame causes the wheel to get misaligned because of the chain’s pull when you’re pedaling. Also, check the bike’s bottom bracket. If this is over-tightened, it can cause significant friction.
You can verify this by removing the chain from the chainring. Make sure that it doesn’t rub against anything that rotates. To adjust the bracket at the bottom, you need practice and special tools too. Just like the issue with the brake pads, it’s recommended to get a mechanic.
If not, one good suggestion is to replace the bottom bracket with something more modern. If your DIY efforts fail, just bring your bike to a bike shop and let someone look at it.
Conclusion
Your bike’s condition spells all the difference in your performance, especially if cycling is part of your lifestyle. Furthermore, cycling won’t be a fulfilling experience if there is a need to pedal harder.
Apart from making sure that you purchase the best bikes on the market like the sixthreezero Around The Block Men’s Beach Cruiser Bicycle or the sixthreezero EVRYjourney Women’s Step-Through Hybrid Alloy Beach Cruiser Bicycle, you can deal with any issues with your existing bike by following the tips you learned in this article.

How to Pump a Bike Tire Without a Pump
A road pump is one of the essential items many cyclists carry in a backpack or attached to the bicycle frame. However, some depend on the garage pump that is not portable, and thus having CO2 cartridges could save the day in case of emergencies.
The good thing about the CO2 cartridges is that they are small, making them easy to carry and can inflate both bike tires within seconds. Though some opt to inflate by blowing air by mouth, this should be the last resort given a variety of affordable cartridges in the market. Here are simple steps followed in using the cartridges:
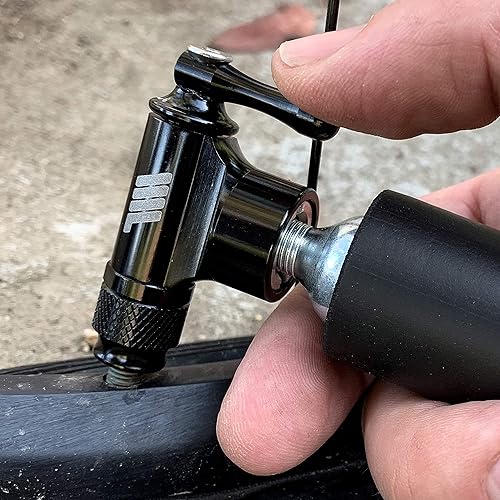
Remove the cap of the inflator
CO2 cartridges are used with the inflators. The inflator’s cap should be removed by turning the cap in a counterclockwise direction by hand. Inflator fitting and CO2 cartridges should then be removed by tipping the end of the inflator up.
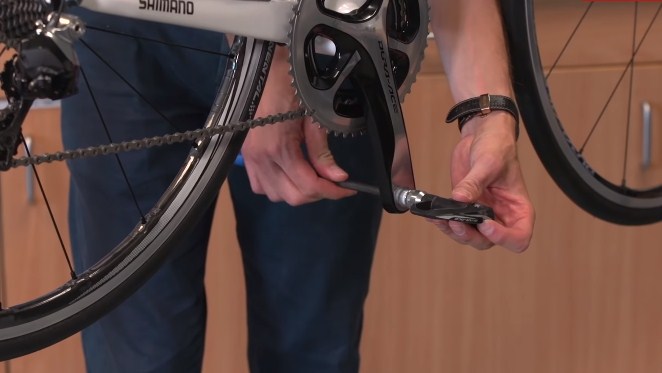
Check the tire and fit the nozzle into its valve stem
You should check the tire well to avoid inflating a broken tube and ending with a flat tire a few seconds later. After which the valve cap should be removed from the stem and inflator fitting threaded or inserted. The tightening of fitting should be done well by hand.
Insert the tip of the CO2 cartridge into the inflator
The inflator once fitted to the stem valve of the bike; the other end will be open. The open end is where the CO2 cartridge neck is inserted with fitting held with one hand. The other hand should be used to push the cartridge into the fitting and turned clockwise until air start to flow into the bikes pipe.
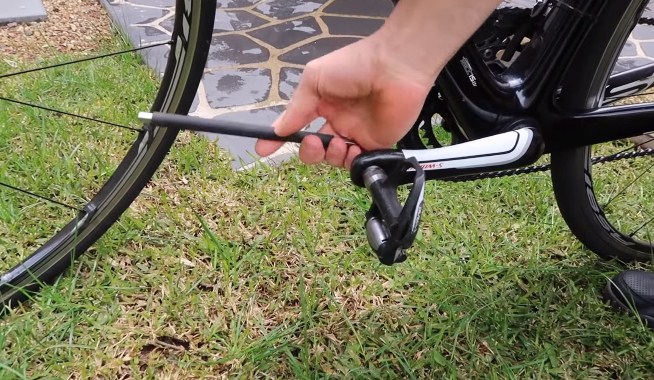
Inflate the tire
There is a risk of over-inflation, which can burst the tire’s tube; thus, inflation should be done with a lot of care. After inflating for a few seconds, the cartridge should be turned anticlockwise to stop the airflow, and inflation level of the tire checked.
If the tire is not well-inflated, turn the CO2 can clockwise and pump more while observing until the desired pressure is achieved.
Remove the cartridge from the inflator
Unscrew or pull off the cartridge from the nozzle then remove the inflator fitting from the bike’s valve stem. The CO2 round is used once and thus should be replaced together with the fitting and kept in inflator tube. You should then put back the valve cap of the tire’s stem.
Replace the CO2 with regular air
CO2 gas tends to dissipate fast as they are made for emergencies. Though it can last for 24 hours, it is good to replace it as soon as you get the pump to continue with the journey. Otherwise, carry more cartridges that will sort you out in case of long travels.
Buy quality CO2 cartridges
Amazon is a trustworthy online store where any cyclist can order for quality and affordable CO2 cartridges. Check two rounds that you can buy:
Mosa 16 Gram Threaded Co2 Cartridges
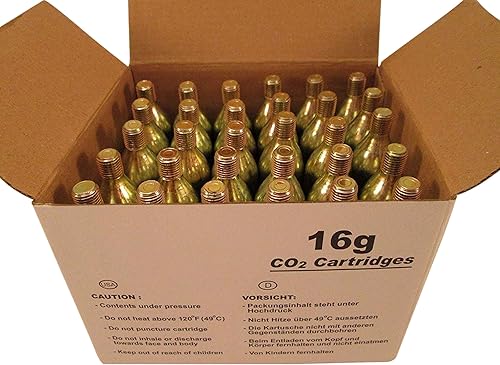
The Mosa CO2 cartridges come in a pack of 30 CO2 cartridges to keep you cycling even when faced with flat tires. The cartridges are threaded and compatible with all inflators that are compatible with threaded types.
Besides, the cartridges are food-grade, thus can be used on tap-it-cap or growl tap system for beer. They come at an affordable price, hence a sure pick for many riders.
Pros
- Compatible with threaded inflators
- Affordable
- Food grade
Innovations Genuine 16 Gram Threaded CO2 Cartridges
The Innovation Genuine comes with 6-pack at an affordable price that gives you value for money. Each is 16-grams and can fill up most of the bikes’ tires. The CO2 gas used is pure and clean, thus cannot interfere with your inflator or tire’s valve stem. They are threaded types and are compatible with all threaded-compatible inflators.
Whether you are cycling standard or road bike tires, the innovation cartridges have got you covered.
Pros
- Affordable
- Perfect for standard and road bikes
- Lightweight
Final Thought
There is no better way of inflating tires without a pump rather than using CO2 cartridges. It is the latest innovation that helps cyclists in the case of emergency flat tires. The cartridges are straightforward to use, as highlighted in the steps above. Just get one from amazon for guaranteed quality and value for your money.